You will likely perform a basic life support assessment (BLS) at some point if you’re a healthcare professional. Healthcare providers perform BLS assessments to help someone currently in respiratory distress, cardiac arrest, or someone with an obstructed airway. A prerequisite to performing the assessment successfully is a thorough knowledge of CPR, specifically using automated external defibrillators (AED) to keep airways clear and unobstructed. Generally, the process involves five steps. We go over all five steps of a complete BLS assessment below.
Step 1: Make Sure the Assessment Is Safe To Perform
Many overlook this step towards a complete BLS assessment, but it’s one of the most important. The first thing you need to do before you start the assessment is confirm the area you and the patient are in is safe and clear of distractions. It’s far less likely that you’re somewhere unsafe if you’re near a hospital. However, you could very well enter an unsafe situation if you’re a first responder or medic, so ensure you consider your surroundings before you start.
Step 2: Check for Responsiveness
The first thing you want to do is to yell if they can hear you and if they know where they are. You need to call for help and get the emergency response unit on the line if the patient cannot respond. You’ll want to secure your AED and call the emergency response unit (ERU) before committing to CPR if you’re alone.
Step 3: Assess Their Breathing
Check the patient’s pulse for the next 10 seconds if they’re breathing. Ensure their breathing is stable and monitor it until the paramedics or EMTs get there.
Step 4: If the Patient’s Breathing Is Abnormal
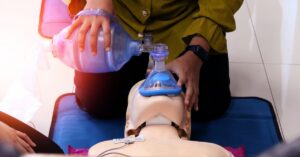
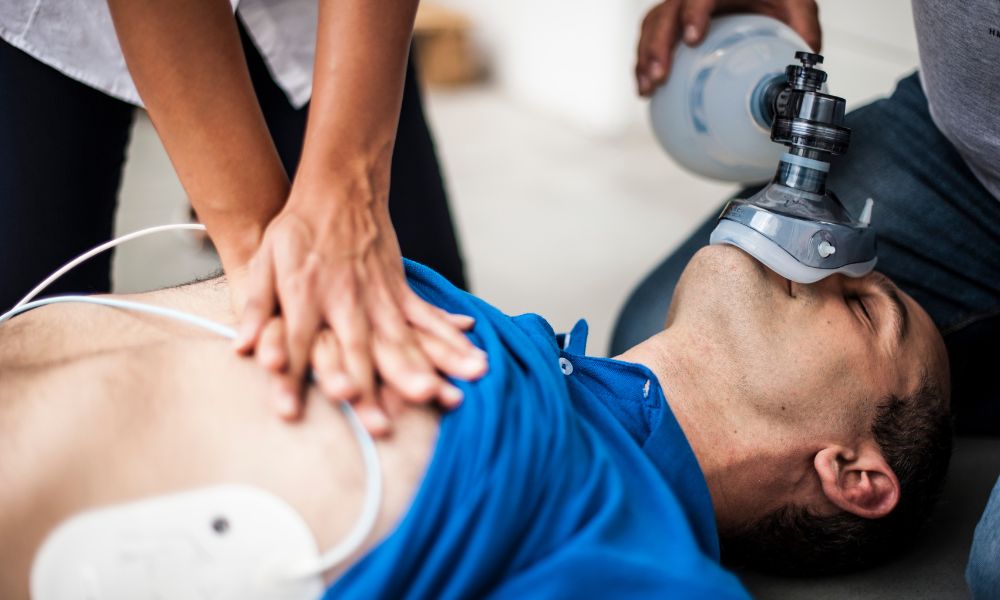
A patient’s breathing patterns are far more likely to be abnormal in situations like these. Give the patient one rescue breath in five-second intervals if their breathing is unstable. Call the emergency response unit after you’ve been giving rescue breaths for two minutes. Finally, check their pulse every two minutes while doing rescue breathing. Start performing CPR if you can’t find a pulse.
Step 5: If the Patient Has No Pulse and Isn’t Breathing
Start administering CPR if the patient isn’t breathing and you can’t find a pulse; compressions should be 30:2. That’s 30 compressions every two breaths. During this process, spend every two minutes checking the patient’s pulse. Use the AED to look at the switch compressors and monitor the patient’s rhythm. Start CPR and defibrillate if you find a shockable rhythm.
Check out our bls healthcare provider certifications at CPR123 if you’re a healthcare provider interested in learning how to conduct a more in-depth BLS assessment. We have all the best certifications that you’ll need across multiple disciplines. Contact us today to learn more.