Healthcare professionals know that mastering peripheral IV insertion stands as one of the most valuable clinical skills they can develop. This step-by-step guide to successful peripheral IV insertion walks you through the entire process, from preparation to successful cannulation.
Whether you work in emergency medicine, hospital wards, or outpatient settings, you’ll use this skill countless times throughout your career. The technique requires practice, confidence, and a systematic approach that ensures patient comfort and safety.
Many providers feel anxious about their first few attempts, but with proper training and repetition, you’ll soon perform the procedure smoothly and efficiently. CPR123 understands the importance of hands-on clinical skills training, which is why healthcare professionals across New York and Texas trust our comprehensive certification programs. Let’s explore each step of the IV insertion process to help you build competence and confidence in this essential skill.
Gather Your Supplies and Prepare Your Workspace
Having strong organizational skills determines your success before you even approach the patient. Collect all necessary supplies on a clean tray or cart: tourniquet, chlorhexidine or alcohol prep pads, an appropriately sized IV catheter, transparent dressing, tape, saline flush, extension set, and gloves. You’ll also want gauze pads and a sharps container within arm’s reach.
Double-check that you have the correct catheter gauge for your patient’s needs. Smaller gauges, such as 22G, work well for pediatric or elderly patients with fragile veins. Larger gauges, such as 18G or 20G, are suitable for trauma or surgical patients who need rapid fluid administration.
Set up your workspace in a well-lit area where you can comfortably access the patient’s arm. Proper lighting helps you visualize veins more clearly and reduces the chance of multiple attempts. Keep your supplies organized in the order you’ll use them, which streamlines the procedure and minimizes patient discomfort from prolonged tourniquet time.
Select the Optimal Vein and Position the Patient
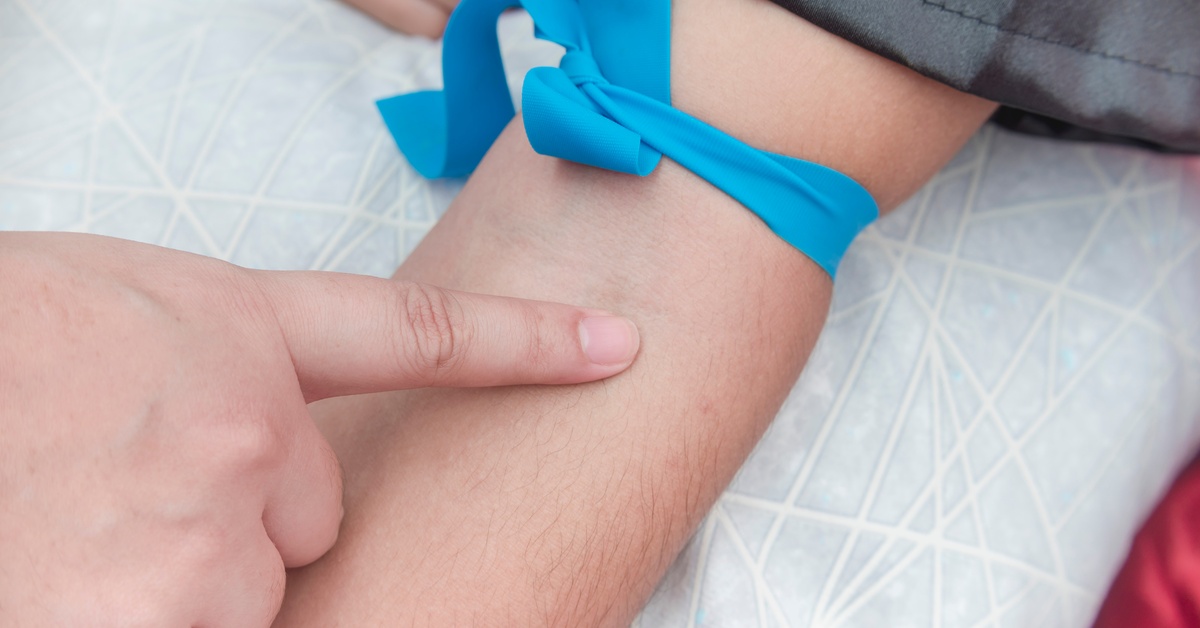
Vein selection can make or break your IV insertion attempt. Start by assessing both arms and, when possible, choose the non-dominant arm, which allows patients to maintain some functionality during treatment.
Look for veins that feel bouncy, spring back when palpated, and run straight without excessive branching. The cephalic and basilic veins in the forearm typically offer excellent options, while hand veins work well for short-term access. Avoid areas over joints, as movement can dislodge the catheter, and steer clear of sites with scarring, bruising, or previous infiltration.
Position your patient comfortably with their arm extended and supported at a level below their heart, which encourages venous filling. Apply the tourniquet four to six inches above your intended insertion site, tight enough to occlude venous return but loose enough to maintain arterial flow.
Have your patient make a fist several times or dangle their arm to promote vein engorgement. Take your time during this assessment phase, as selecting the right vein significantly increases your first-attempt success rate.
Clean the Site and Prepare for Insertion
Properly preparing the site is the first step in preventing infection. Put on clean gloves and thoroughly clean the insertion site using a circular motion that starts at the center and moves outward.
If you use chlorhexidine, allow it to dry for at least 30 seconds. This drying time activates its antimicrobial properties, providing optimal skin disinfection.
Alcohol prep pads require a similar drying period. Resist the temptation to palpate the vein again after cleaning, as this reintroduces bacteria to the prepped site.
Remove your catheter from its packaging and inspect it for any defects. Loosen the cap on your saline flush so you can access it quickly after successful insertion. Stabilize the vein by applying gentle traction on the skin below your insertion point with your non-dominant hand. This technique prevents the vein from rolling during needle insertion.
Take a deep breath and visualize your approach angle, typically 10-30 degrees depending on vein depth. Patients appreciate it when you warn them about the upcoming stick, so communicate clearly: “You’ll feel a small pinch now.”
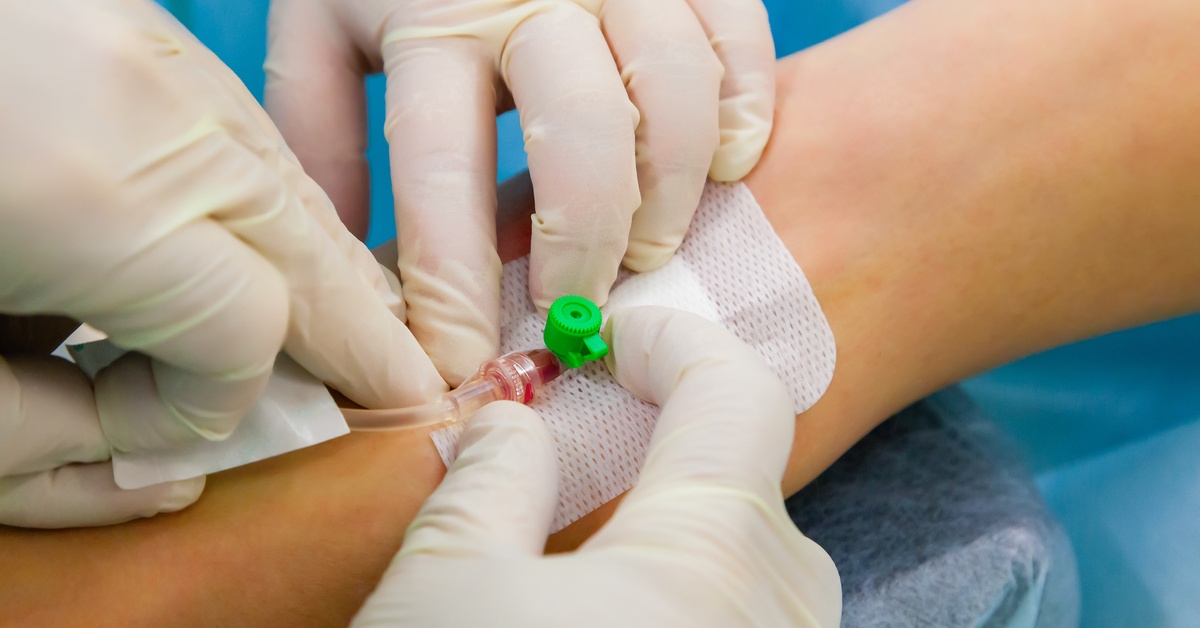
Insert the Catheter With Confidence and Control
The actual insertion requires steady hands and precise technique. Hold the catheter hub with your dominant hand, bevel up, and align it with the vein at your chosen angle. Pierce the skin swiftly and smoothly, as hesitation creates more discomfort for patients.
Advance the needle until you see blood flash in the catheter chamber, which confirms you’ve entered the vein. This moment is critical: lower your angle to nearly parallel with the skin, then advance the entire unit forward about a quarter inch to ensure the catheter enters the vein lumen.
Now comes the tricky part. Hold the needle steady with your dominant hand while you slide the catheter off the needle and into the vein with your non-dominant hand. You should feel minimal resistance if you’re in the correct position.
Immediately release the tourniquet after you fully advance the catheter. Apply gentle pressure on the vein above the catheter tip to prevent blood backflow, remove the needle, and dispose of it in the sharps container. Work efficiently but carefully during this phase to maintain your sterile technique and patient safety.
Secure the Catheter and Verify Patency
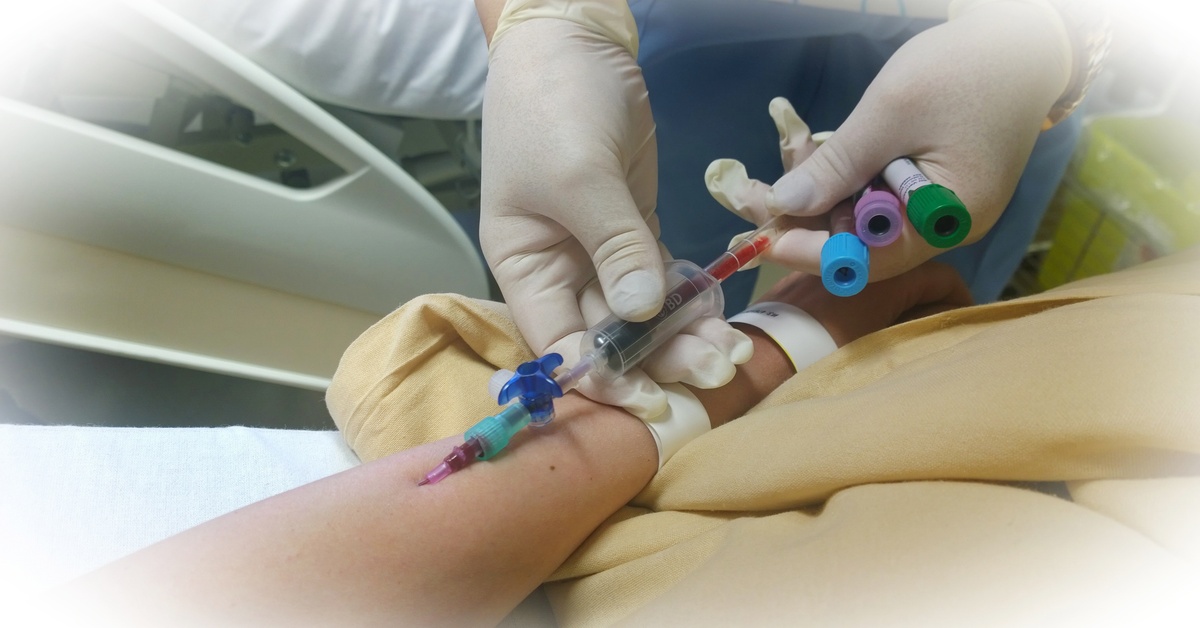
Securing the catheter properly prevents complications like dislodgement, phlebitis, and infiltration. Connect your saline flush or extension tubing immediately after removing the needle. Flush the line slowly while watching for any signs of infiltration. Swelling, blanching, or patient discomfort indicate the catheter sits outside the vein.
A patent IV should flush easily without resistance, and you should observe no swelling at the insertion site. Once you confirm patency, apply your transparent dressing over the insertion site, ensuring the entire catheter hub remains visible for ongoing assessment. The dressing should lie flat without wrinkles, as wrinkles can create pressure points or trap moisture.
Add additional tape or a securement device if your facility protocol requires it, but avoid over-taping, which makes later removal difficult and painful. Those pursuing peripheral IV certification will learn that documentation matters, too. Always record the date, time, catheter size, insertion site, number of attempts, and your initials, per your facility’s policy.
Finally, clean up your workspace and dispose of all contaminated materials properly. Double-check that you have safely discarded all sharps and prepared your area for the next patient.
Monitor and Maintain Your IV Site
Your responsibility doesn’t end once you secure the catheter. Ongoing assessment prevents serious complications and ensures continued IV function. Check your IV site at the beginning of every shift and before administering any medications or fluids.
Look for signs of complications: redness, warmth, swelling, pain, or drainage at the insertion site. Palpate the area gently. It should feel soft and non-tender. Ask patients to report any discomfort, tingling, or tightness around the IV immediately.
Flush the IV line regularly according to your facility’s protocol, typically every 8-12 hours for continuous infusions or before and after intermittent medications. When you flush, use the push-pause technique to create turbulent flow that prevents fibrin buildup inside the catheter. Rotate peripheral IV sites every 72-96 hours or sooner if you notice any complications.
Remember this step-by-step guide to successful peripheral IV insertion as you develop your skills. Sufficient practice will turn this crucial information into second-hand knowledge, and every successful insertion will build your clinical confidence and competence.
CPR123 offers state-of-the-art American Heart Association courses that help healthcare professionals acquire the practical competencies needed to excel in patient care. Learn more about our peripheral IV insertion classes today.